

eggplant purple with cream tigers (Blake picked it out with the express purpose of me turning it into a hawaiian shirt). We picked out Simplicity 4760, mostly because I liked the front yoke, and it looked like it would generally do the trick.


For the first mock up, I cut a medium (based on B's measurements, and the pattern envelope). I don't know if the pattern drafter had Paul Bunyan in mind with this one, but it was massively huge. I was defeated at this point because I have a history of wadders, but the next day, I recut the first mockup down to a small, and I didn't feel so bad because I didn't waste any more fabric. This version was much better, just a few small tweaks.
I've learned a lot from trying to fit myself in regards to wide back adjustments, and using vintage patterns that I've had to size down. This helped me immensely in understanding what I had to do next. Plus, I had his original Hawaiian shirt to measure off of. This was also extremely helpful in knowing what to do next.
Pattern adjustments:
1. I cut the back down to a size small, except I graded up to the medium from the waist to the armpit. B's got a broad upper back and I usually do the 'L' shaped pivot out method I learned from the Slapdash Sewist's blog, but this ended up working just as well.
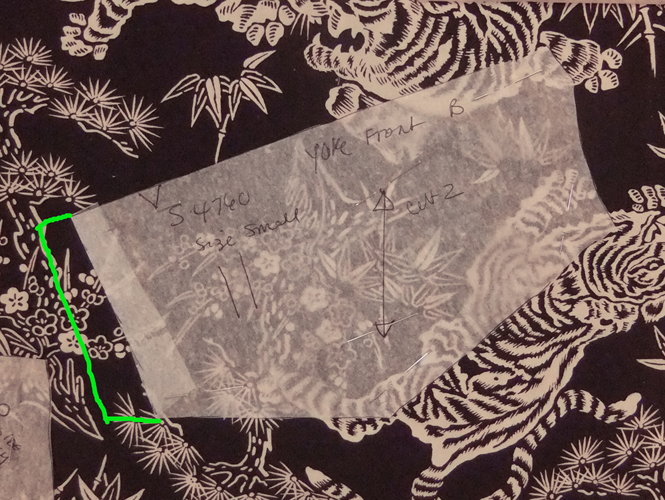
2. The front was still very wide on the second mockup, so I took a 1/4 inch tuck (is that right, or is it 1/4 inch overlap that ends up being 1/2 tuck?). This helped a lot, but when I compared my pattern piece to the original Hawaiian shirt, there was still some width in the front that didn't need to be there.
3. Comparing the flat pattern to the original shirt, it looked like there could be another pivot adjustment going on. I cut the front piece in the style of the broad back adjustment (L shaped cut up to the seam allowance at the top), and overlapped instead of spread. It's like a small chest adjustment. I adjusted the yoke piece accordingly; easy, because it's just an overlay.


I added special topstitching and piping details to contrast with the busy pattern on the centre front and left pocket, and a little inside detailing.

Here is the finished shirt:

Things I will change if I make it again:
1. The pocket placement was weird. The right pocket ended up way too close to the CF. I'd move them both out about an inch.
2. I'd add about 1/2 inch to the length so I can make the hem at the bottom the same as the sleeve. The original pattern piece had a really large hem. I can't remember how much I hacked off, but adding 1/2 inch will allow for a 1/4 inch fold over with a 6/8 inch hem – same as the sleeve.
3. Although B proclaims the fit to be superior, I think the shoulders need to be taken in about a 1/2 inch. I could leave it, but it's an easy adjustment in this pattern.
In the end, will he wear it?? It's a pretty unique material. I tried to "bowling-shirt-it-up" with the piping detail. I like it. I think B is planning on wearing it to his niece and nephew's birthday party in a couple of weeks, and we're having people over for supper tonight, so he might wear it today even.
In any case, I've got a great, workable pattern that sews up very easily.
No comments:
Post a Comment